Isabelle Cauwet, applications engineer, takes us through her recommendations for producing good quality stereo pairs.
1- Capture two images of your sample
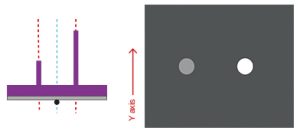
For stereoscopic 3D reconstruction to work correctly and accurately, the two SEM images used must be taken from two different angles of view. A stereo pair is typically obtained by tilting or rotating the sample by a few degrees along the X or Y axis. The diagram below represents the SEM tilt stage (left) and a sample to be studied (right). Topography has been simplified to two “pillars”, one low and one high (the sample is pictured from above):
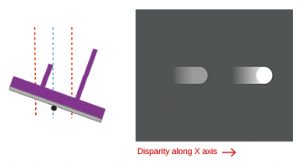
When the sample is rotated around the Y axis, we can see that the top of the pillars have moved right along the X axis:
Now if we reverse rotation, the pillars move left along the X axis:
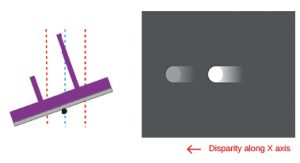
In the two resulting images, the difference between the positions of the pillars is called disparity. Note that the higher the pillar, the great the disparity. And if disparity and angle of rotation are known values, it is possible to determine the height of the pillars.
A few other things to bear in mind…
Remember that image disparity is increased by:
increasing magnification
increasing tilt difference between two images
increasing image resolution
If you already have a rough idea of the height value of your sample, you should choose a magnification value which will result in an image 20 times as wide as the expected height value and use a tilt value of 5 to 10°.
Example for an expected height value of 1µm:
rotate the sample 10° around the Y axis and set image width at 20µm along the X axis
or rotate the sample 10° around the X axis and set image width at 20µm along the Y axis
After a bit of practice, you will be able to reconstruct samples featuring smaller height values.
2- Ensure disparity is along one axis only
To achieve accurate reconstruction it is important to make sure that the sample table is rotated around one axis only between image takes. If the table is rotated around the X axis only, disparity will be along the Y axis. Similarly if the table is rotated around the Y axis only disparity will be along the X axis.
NB. Reconstruction is still possible with a disparity of just a few pixels along two axes (X and Y), but calculation time will be significantly longer and the result will be less accurate.
3- Eliminate shift
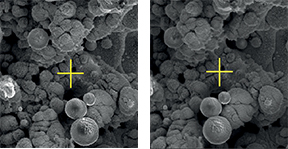
In order to avoid image shift, if you have a eucentric table, the center of the rotation axis should coincide with the center of gravity of the sample. In all other cases, when rotating the table between two image takes, you should ensure that a significant feature of your sample is positioned at the same point on each. Once again, Mountains® can deal with image shift of a few pixels, but this significantly increases calculation time.
4- Use the same magnification and working distance
As a general rule, magnification and working distance (distance from the sample to the projected image) should be the same for both images.
5- Work with textured images
Only sufficiently textured areas in images may be successfully matched. It is important to avoid uniform zones.
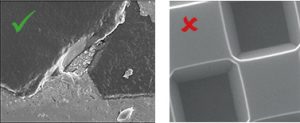
Similarly overexposed zones do not contain enough texture and cannot be matched correctly.
6- Only use clear and focused images
Make sure that the images are clear and properly focused. If the images are blurry then the quality of the reconstructed image will be reduced.
7- Use images with the same contrast and brightness
Make sure that both images have the same contrast and intensity. This will make point matching a lot easier. The Enhance Image Operator in Mountains® can be used to correct image contrast and brightness before reconstruction.
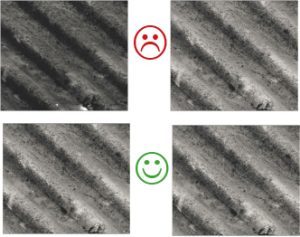
Check your images: Once you have your stereo pair, you can do a quick visual check by opening the images in your File Explorer and switching quickly from one to the other.
Find more about our stereoscopic reconstruction on our Video Tutorial.
Author : Isabelle Cauwet, Applications and Support Manager